Designing the Custom Input Template
On the Designer tab of the Form Builder, you can customize the look of the input form
Navigation Path: Toolbox>Form Builder
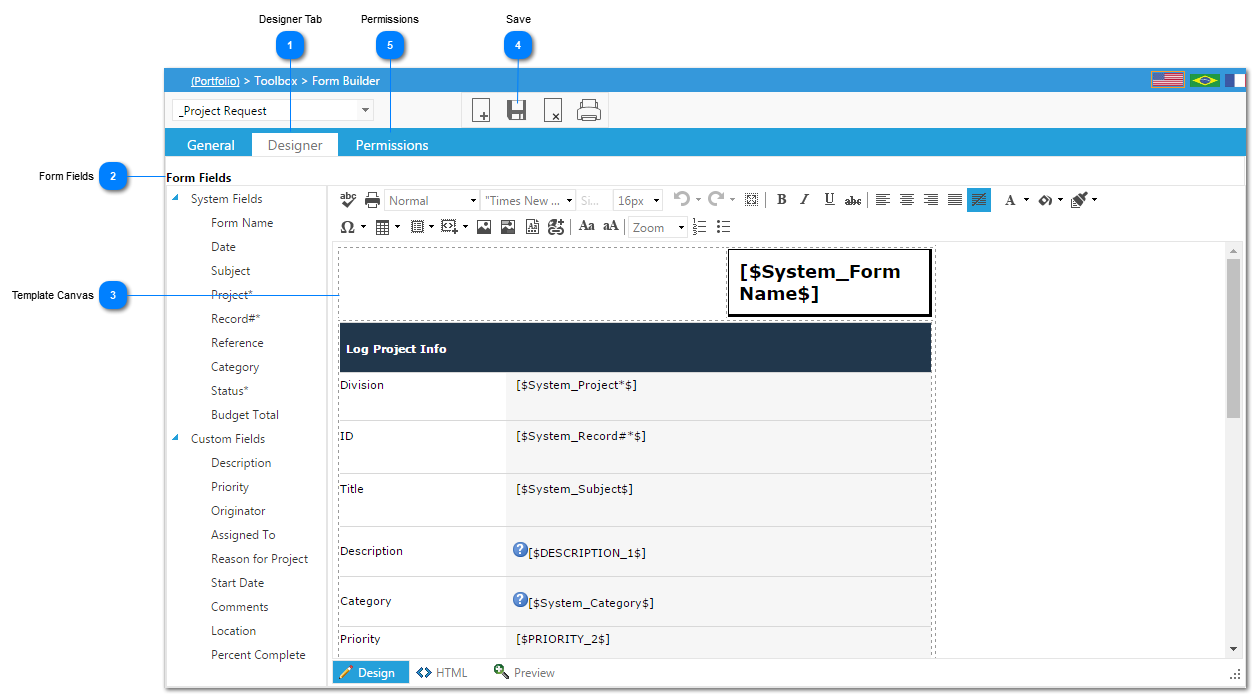
 Designer TabSelect the Designer tab to customize your input form
|
 Form FieldsAll available input fields are available in this list. They are split between the System Fields, which include all of the generic fields that are available in all custom forms, and the Custom Fields that you created on the General Tab. Note: Table fields are not available in this list as the table will appear at the bottom of your custom template.
|
 Template CanvasThis is where you will design the look of your template. You can type any text and format it in any way that you would like including bolding, italicizing, sizing and coloring.
Once you have entered the text, place your cursor on the canvas where you would like to see one of the input fields, then select the field from the Form Fields list and it will be placed at your cursor position.
|
 SavePress the Save button to save your changes to the custom template.
|
 PermissionsClick to grant access to user groups.
|
