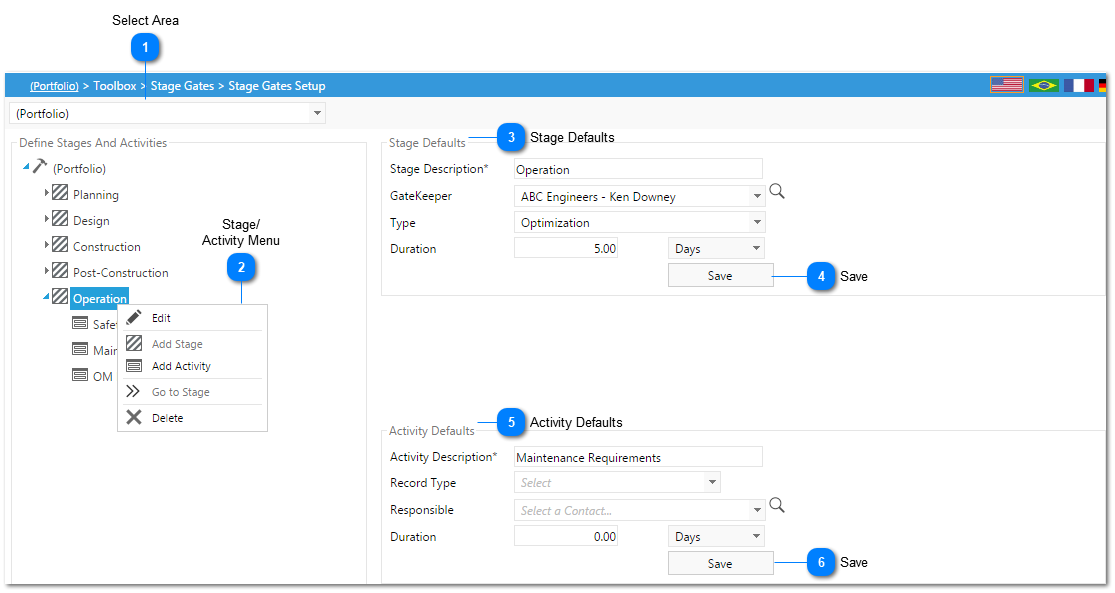
Right click on either the stage or activity and the following options will be available:
Edit: Click to edit the stage or activity. Once clicked the stage or activity defaults will be displayed on the right hand side of the screen. The defaults can also be displayed by clicking on the stage or activity.
Add Stage: Click to add a new stage. Right click on the top folder (in this example portfolio) and click Add Stage. Enter the stage description then click off of the new stage. To enter stage defaults, click on the stage name (or use the edit option).
Add Activity: Click to add a new stage activity. Right click on the stage name and click Add Activity. Enter the activity description then click off of the new activity. To enter activity defaults, click on the activity name (or use the edit option).
Go to Stage: Click to go to the actual project record.
Activity Description: The activity description will be automatically populated when the activity was added. To edit, type over the current description.
Record Type: Select the record type or area of the activity (invoices, commitments, RFI's etc.)
Responsible: Select the person responsible for overseeing the activity. Utilize the magnifying glass to look up a contact.
Duration: Enter the duration of the activity, then select either days, months, quarters, weeks or years.