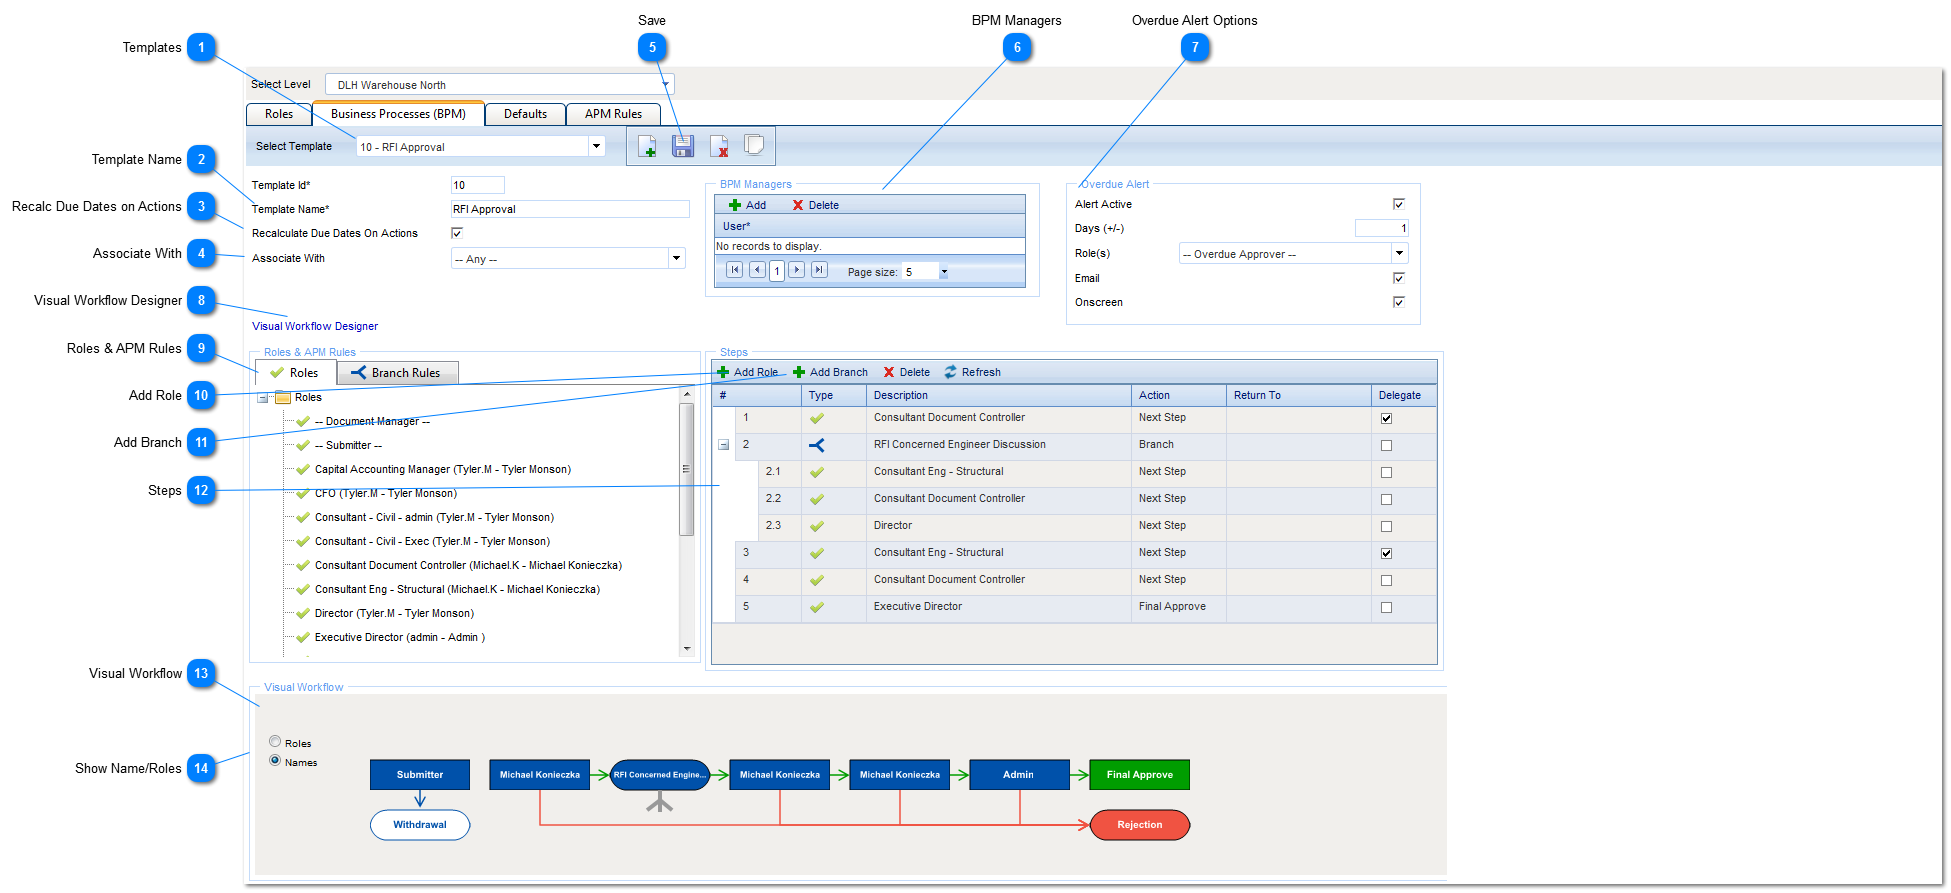
The BPM tab is used to create or modify an existing workflow.
 TemplatesSelect an existing template (to modify) or click the Add button to create a new BPM.
|
 Template NameEnter the new template name
|
 Recalc Due Dates on ActionsCheck to recalculate due dates based on the length of time that previous steps took
|
 Associate WithSelect the module(s) that this BPM will be associated with. Or, select Any to have the ability to use with any module.
|
 SaveClick the Save icon to save the BPM record.
|
 BPM ManagersThe user designated as the BPM Manager can edit the record after it is finished (approved, withdrawn, rejected etc.)
|
 Overdue Alert OptionsSelect the options that will apply to this BPM template
Alert Active: Check to turn on alerts
Days (+/-): Determines how many days before or after the due date the Alert will be activated
Roles: Select all roles that will receive the alert
Email: Check to email the Alert
Onscreen: Check to active an onscreen alert
|
 Visual Workflow DesignerClick to create your workflow in the designer view (drag and drop roles, steps etc.) You can also design by following the steps listed in #4.
|
 Roles & APM RulesDrag and drop the roles from the left to the right under the workflow grid OR click Add Role or Add Branch. A list of the existing roles will be displayed in the Roles and APM rules box.
|
 Add RolePress to add a new Role Step - See "Add Role Step" section for Role Step options
|
 Add BranchPress to add a new Branch Step - See "Add Branch" section for Branching options
|
 StepsDrag roles to the Steps box to build the workflow
Type: Role Step or Branch - Press the icon in this column to edit the line options
Description: Role Name or Branch Description
Action: Next Step, Branch or Final Approval
Return To: Select which step a return will be sent to
Delegate: Checked if this step is delegated to another user
|
 Visual WorkflowThis provides a flowchart or picture of the process you created in the grid above.
|
 Show Name/RolesSelect whether the visual workflow should show the user name or the workflow role
|
|