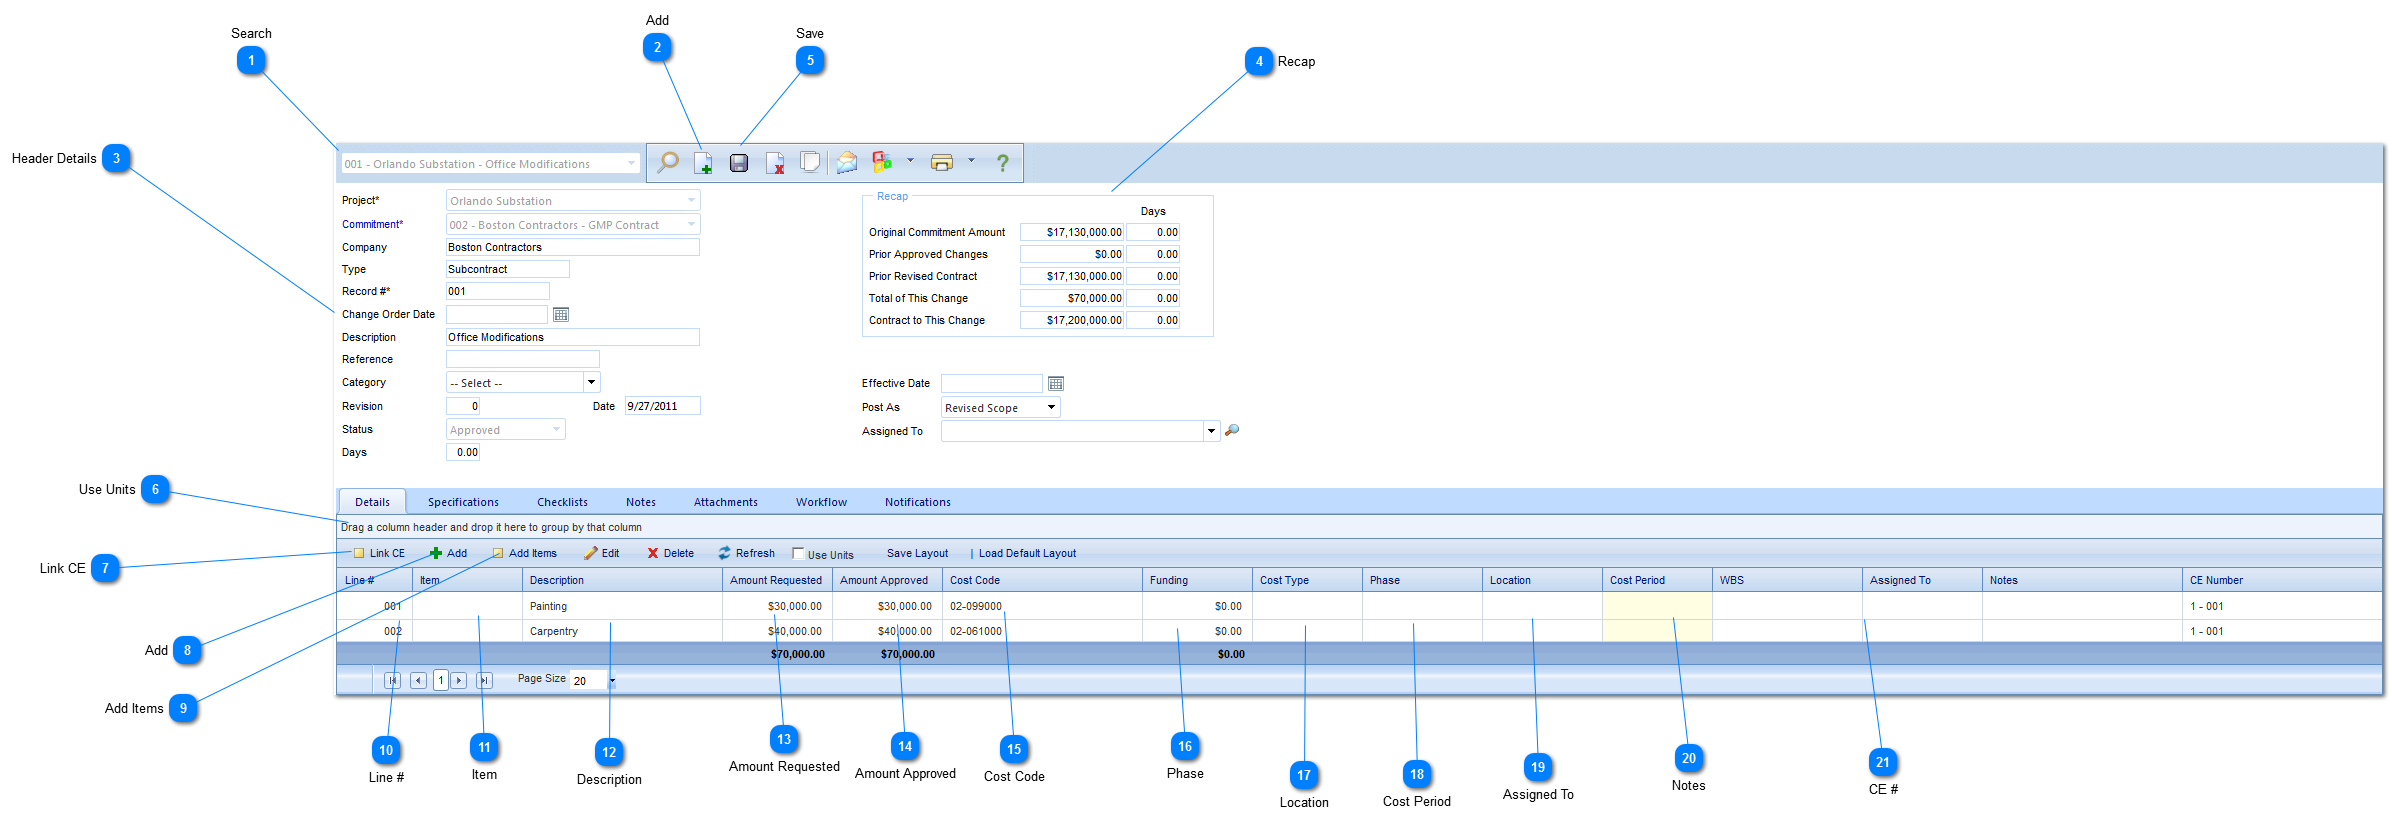
Commitment CO

 A Commitment Change Order is a written document between the general contractor and the subcontractor or vendor authorizing a change in the work or an adjustment in the commitment sum or the commitment time. The commitment sum and the commitment  time may be changed only by change order.
 
Navigation Path:  Cost Management > Change Management > Commitment CO
 
Commitment CO
1

Search

Use to search existing Commitment Change Orders.
2

Add

Click to add a new commitment CO.
3

Header Details

Project:  Used to select the project associated with the Commitment Change Order.
Commitment:  Select the commitment associated with the change order.
Company:  This field will be automatically populated by PMWeb based on the commitment selected.
Type:  This field will be automatically populated by PMWeb based on the commitment selected.
Record #:  This field will be automatically populated by PMWeb.
Change Order Date:  Enter the date the change order was created.
Description:  Enter a general description (a more detailed description should be entered in the details section of this form).
Revision:  Enter the revision number.
Date:  This field will automatically be populated by PMWeb with the current date.
Status:  The status (draft, submitted etc.) will automatically be updated by PMWeb based on the workflow configuration.  If no workflow is configured, this field can be changed one the header details are saved.
Days:  Enter the number of days the change order is valid for.
Effective Date:  Enter the date the change order becomes effective.
Post As:  Select whether this change order should be posted as part of the Original Scope or whether it should show as part of the Revised Scope.
Assigned to: Select the company assigned to manage this change order.
4

Recap

These fields provide an overview of the Commitment Change Order.  This area will be populated after you save the header details and add line items to the Commitment Change Order.
5

Save

Click to save the header details of the form.
6

Use Units

This field will allow you to enter units of measure and quantities of that item.  If this option is not selected, the line item will be a lump sum value.
7

Link CE

Clink to link existing change events to the change order.  If selected, a list of all existing CE's will be displayed.  To link the CE's click the checkbox and click Save and Close.  Note:  Only the "Cost" (Child) lines from the Change Events are available to link.
8

Add

  Click to add a new line item.
9

Add Items

Click to add items to the Commitment Change Order.  Once clicked a list of existing items will be displayed.  Drag the items from the left hand side of the screen to the right hand side.  Once all items are selected, click Save and Close.
10

Line #

This field will be automatically populated by PMWeb.
11

Item

This field will be automatically populated by PMWeb if you used the Add Items button to add the line item.
12

Description

Enter a description of the line item.
13

Amount Requested

Enter the amount originally requested for this line item.
14

Amount Approved

Enter the approved change amount (note this may differ from the amount requested).  The difference between the amount requested column and the amount approved column is used to show the cost savings due to negotiation.
15

Cost Code

Select the Cost Code associated with the line item.  Cost Codes for the project are created in Cost Management>Budget>Cost Codes.
16

Phase

Select the phase (design, construction etc.) the project was in when the change was needed.
17

Location

Select the location that the change was needed. Locations are set up in the Portfolio>Lists>Projects menu.
18

Cost Period

Select the cost/accounting period the request is being made for.
19

Assigned To

Select the company/vendor the line item is assigned to.
20

Notes

Enter additional notes relating to the line item.
21

CE #

This field will be automatically populated by PMWeb based on the change events that are linked to the change order (using the Link CE button).