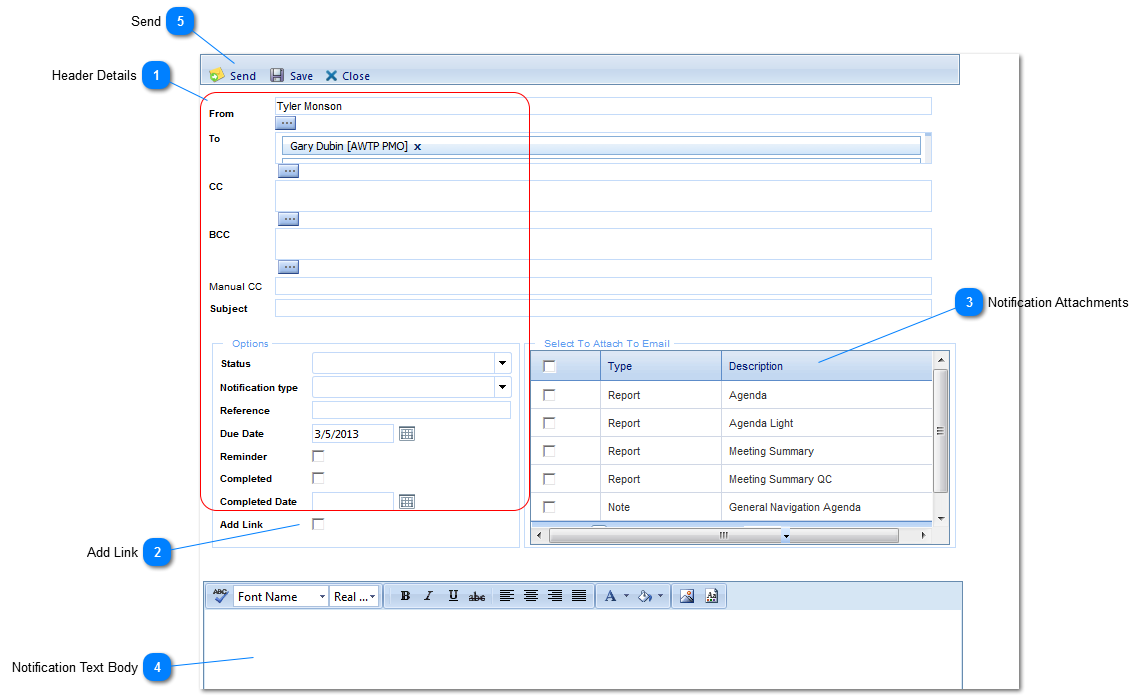
The following screen will appear once the Notification Wizard button is pushed. It is used to email information about the record to one more multiple people.
Header Details
To: Enter the email address of the recipient for the notification or select the recipients using the button to access the PMWeb Contacts list.
CC: Enter the email address(s) of any recipients whom will be carbon copied or select the recipients using the button to access the PMWeb Contacts list.
BCC: Enter the email address(s) of any recipients whom will be blind carbon copied or select the recipients using the button to access the PMWeb Contacts list.
Status: Select the status of the notification from the drop down. The options for this field are configured by your PMWeb Administrator in the Portfolio > Lists > Lists > Status (Notifications) folder.
Notification Type: Select the notification type from the drop down. The options for this field are configured by your Administrator in the Portfolio > Lists > Lists > Type (Notifications) folder.
Subject: Enter the notification subject.
Created Date: This filed auto populates with today's date and cannot be changed.
Sent Date: Enter the sent date of the notification.
Due Date: Enter the date that the notification must be responded to (if applicable).
Completed Date: Enter the date the notification was completed. Any notification that does not have a complete date will be add to the To contacts' "Notification Inbox".
Click to include a link to directly access the record associated with the notification. Any PMWeb licensed users will be able to click the link in their email and return directly to this record.
Select the check boxes for the available information you wish to include in the notification. The check box options are generated from any files that have been attached to the record.
MergeTemplates: Add any MS Office merge templates associated with the record type.
Reports: Add any PDF reports associated with the record type.
Notes: Add any notes from the Notes tab of the record.
Record Attachments: Add any attachments that were uploaded via the attachments tab.