The Polyling feature is used to polyline documents that are stored in the document manager.
Navigation Path: Toolbox>PM Web Viewer
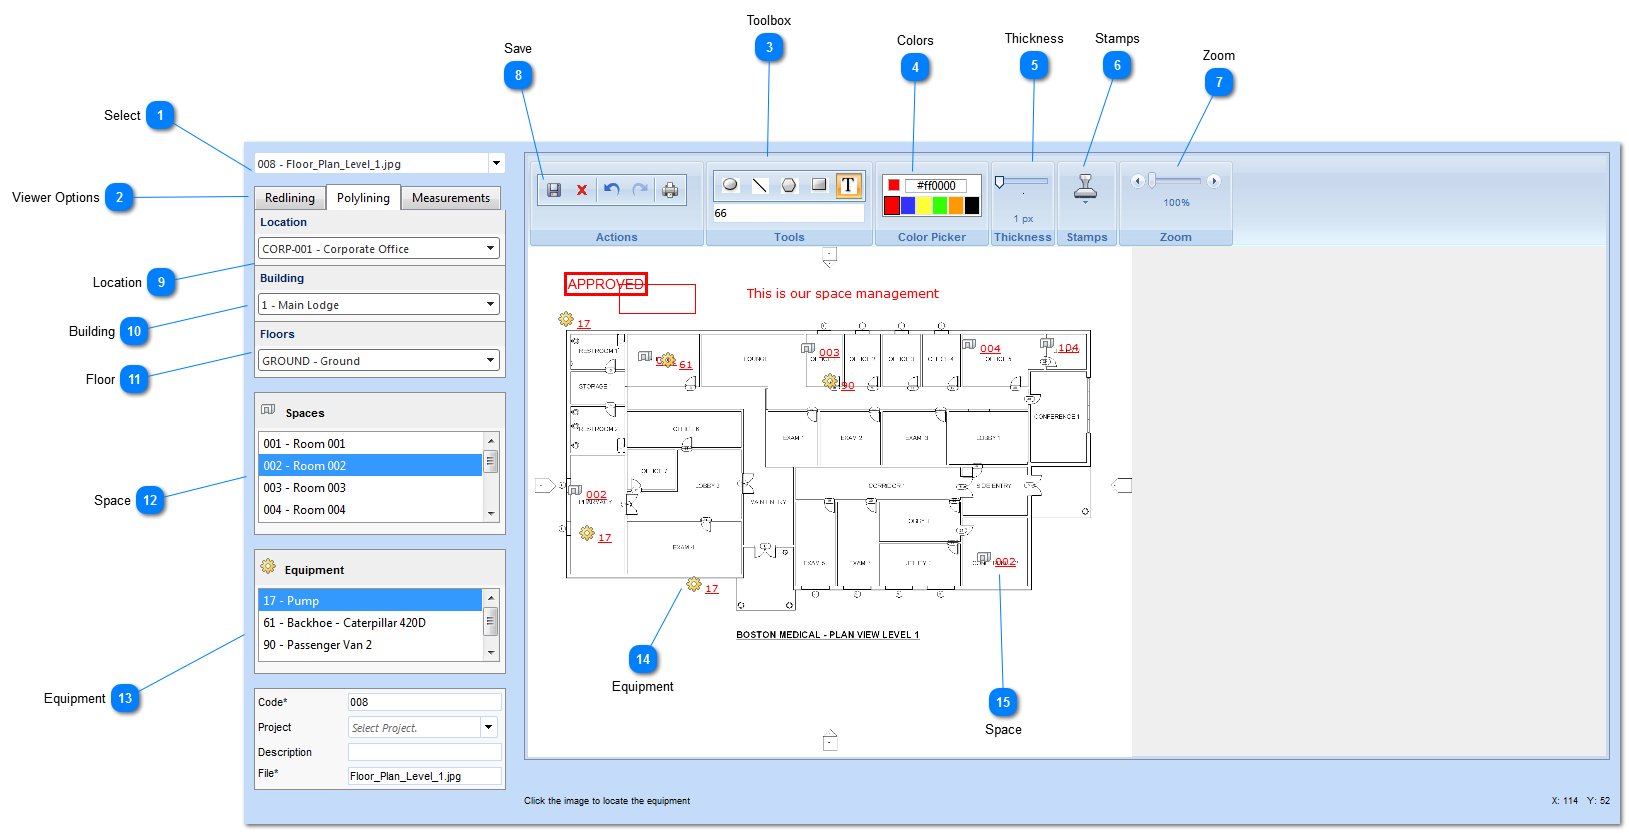
 SelectUse to search for existing documents.
|
 Viewer OptionsClick the Polylining tab.
|
 ToolboxSelect the tool. you would like to use for a markup by clicking on the tool button. Click on the area you want to place the markup (two clicks from/to). To add text, click on the T button and enter the text you want to add in the Enter your text here box. Click on the area you want to place the text.
|
 ColorsSelect the color.
|
 ThicknessSelect the thickness (in pixels).
|
 StampsClick to add a stamp (approved, rejected etc). To add click on the stamp button, select the type of stamp by clicking on the name. Click on the area of the document you want to add the stamp.
|
 ZoomSelect to zoom in/out using the arrows.
|
 SaveClick to save the markup.
|
 LocationSelect the location.
|
 BuildingSelect the building.
|
 FloorSelect the floor.
|
 SpaceSelect the space to use for markup. Once selected click the document to identify the space. Once added the space will be noted with a red link and space icon.
The options for this field configured by your Administrator in the Portfolio>Lists>Lists menu.
|
 EquipmentSelect the equipment to use for markup. Once selected click the document to identify the location of the equipment. Once added the space will be noted with a red link and an equipment icon.
The options for this field configured by your Administrator in the Portfolio>Lists>Lists menu.
|
 EquipmentIdentifies equipment.
|
 SpaceIdentifies space.
|