User Guide
×
Menu

Redlining

The Redlining feature is used to markup documents that are stored in the document manager.
 
Navigation Path:  Toolbox>PM Web Viewer
Redlining
1

Select

Use to search for existing documents.
2

Viewer Options

Click the Redlining tab.
3

Toolbox

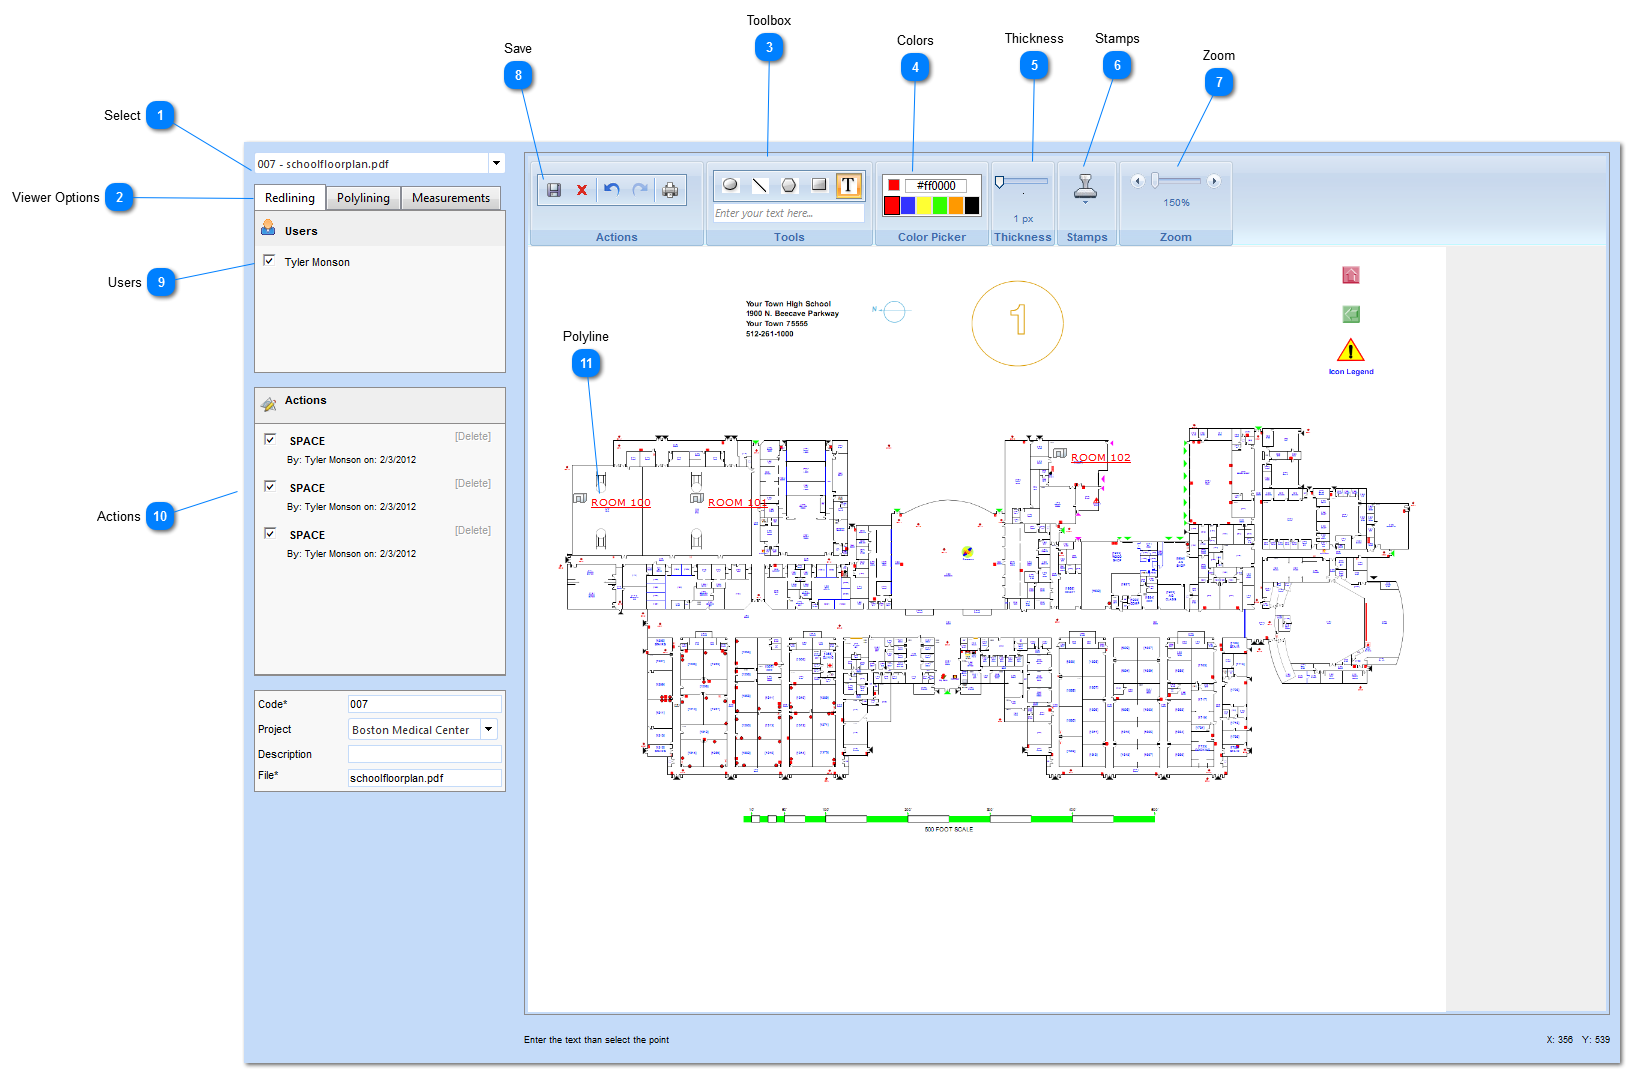
Select the tool. you would like to use for a markup by clicking on the tool button.  Click on the area you want to place the markup (two clicks from/to).  To add text, click on the T button and enter the text you want to add in the Enter your text here box.  Click on the area you want to place the text.
 
4

Colors

Select the color.
5

Thickness

Select the thickness (in pixels).
6

Stamps

Click to add a stamp (approved, rejected etc).  To add click on the stamp button, select the type of stamp by clicking on the name.  Click on the area of the document you want to add the stamp.
 
7

Zoom

Select to zoom in/out using the arrows.
8

Save

Click to save the markup.  Once saved the actions will be logged in the users and actions sections.
9

Users

Displays users who have made changes/markups to the document.
10

Actions

Displays the changes that were made to the document including user name and date the change was made.
11

Polyline

Click to view details of a location, room, building etc.  These links are set up in the polylining tab.