If you have been designated as an approver in a workflow you will receive an email requesting your approval when the workflow has moved to your step. You can also see all workflows awaiting your action in the "Workflow Inbox" found on the Home Screen. Both the email and the Inbox will contain a link that brings you directly to the record that required your review. Click on the link and then use the following steps to approve the record.
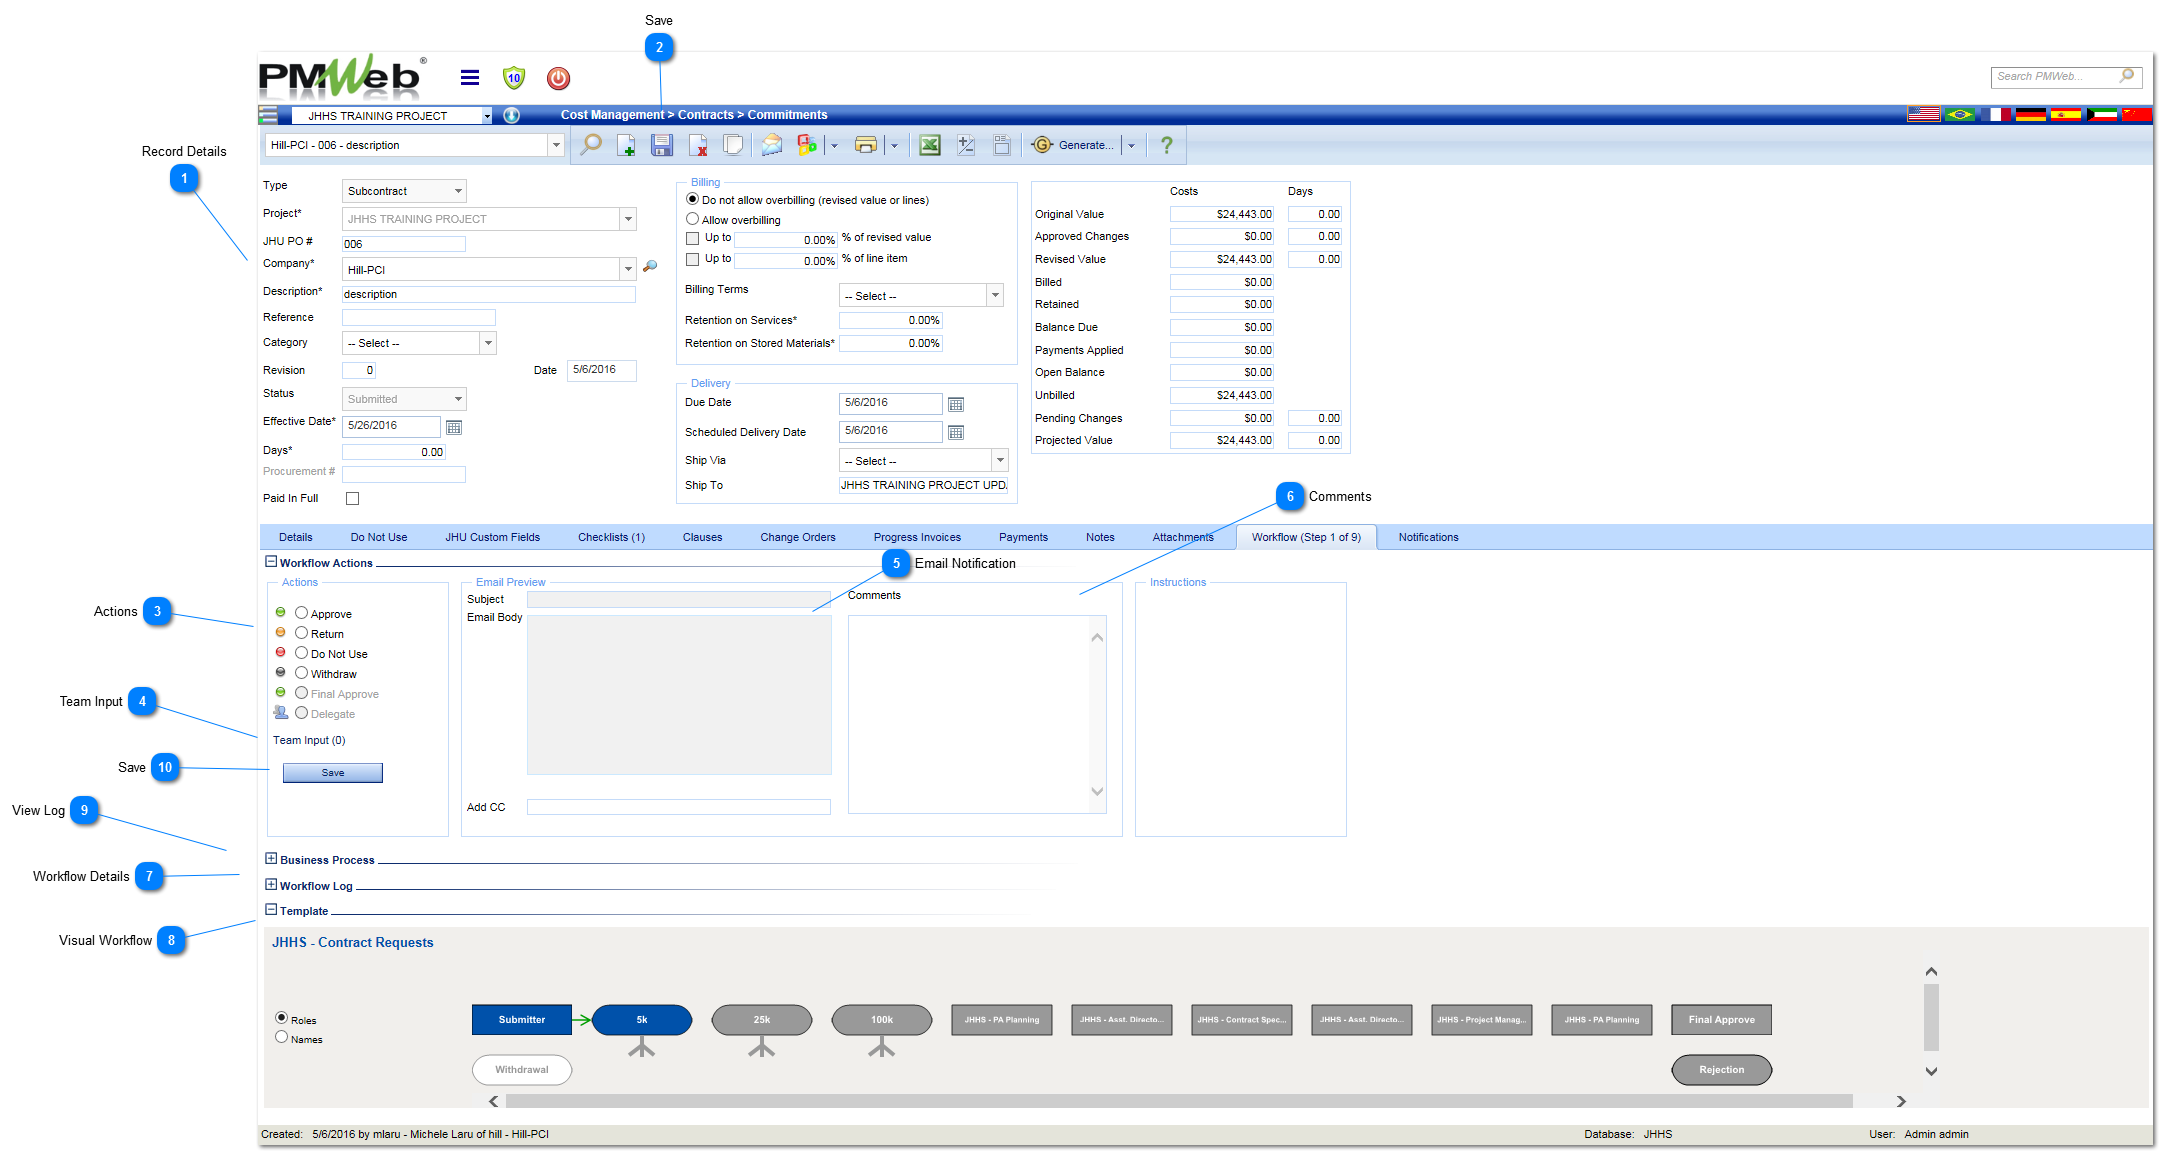
Record Details
Review the record details including any Attachments or Notes .
Depending on what rights you have been given you will might be able to make modifications to the record. If you do make changes make sure to Save them before you approve the workflow or they will be lost.
Reject: Ends the workflow. The record becomes lock and no more changes can be made.
Withdraw: Is only available for the workflow submitter (you), it returns the workflow back to you (the submitter) no matter where it is in the process. The record becomes lock and no more changes can be made.
Once an action is selected, the email section of the form will be populated with information the person in the next step will receive.
These fields will display the email notification information that the person assigned to the next step will receive. The only field that can be edited is the Add CC field. The format of the email is configured by your Administrator in the Workflow menu.
These fields display how the workflow is configured ads well as status of the workflow as it moves through the workflow. The workflow is configured by your Administrator in the Workflow menu.
Once all information has been entered and reviewed, click Save to submit the workflow to the next step. The person assigned to the next step will receive and email notification which includes the information contained in the Email Notification and Comments fields.