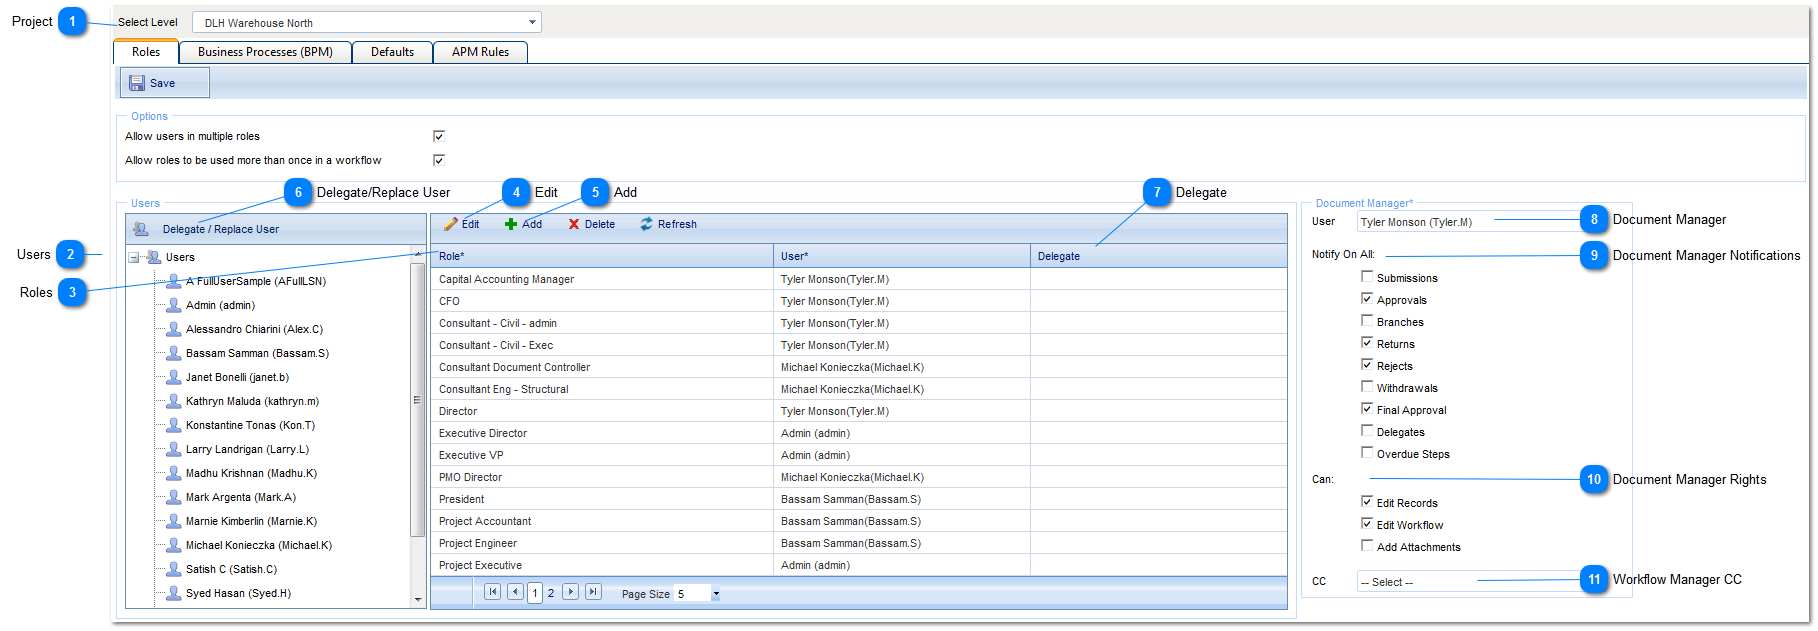
The Roles tab is used to add users to roles within your workflow.
 ProjectSelect the Project, Program, or System level that the workflow is going to be used for.
|
 UsersThe user list will automatically be populated based on who has permissions to the project.
|
 RolesThis tab is used to define Workflow Roles, assign users to those roles and to assign the Document Manager for the Workflow.
|
 EditHighlight the Workflow Role you wish to edit, then click on the Edit button. Once changes are made, click Save.
|
 AddClick to Add a new role. Type the role name in the role column, then use the drop down menu in the user column to select the user to assign to the role. Once complete click Save.
|
 Delegate/Replace UserUse this option to select a user that will need to have his/her workflows delegated to another user. Options include the ability to select project(s), delegating or replacing, new or current workflows and end dates.
|
 DelegateThis person will receive all workflow notifications and have the same rights as the original User for this workflow role for this project. The delegate can be used when the original user will be unavailable to fulfill their workflow role.
|
 Document ManagerSelect a Document Manager for the Workflow. Check the boxes that apply to the Document Managers Workflow rights.
|
 Document Manager NotificationsChecking these boxes will determine when/if the Document Manager will be notified during all workflows
|
 Document Manager RightsChecking these boxes will determine what rights the Document Manager will have while workflows are in progress.
|
 Workflow Manager CCYou can select one other user who will be copied on all notifications that the Document Manager receives.
|
|