User Guide
×
Menu

Schedules

Navigation Path:  Scheduling > Schedules
Schedules
1

Select Schedule

Use to search for existing schedules.
2

Header Details

 
Project:  Select the project the schedule is being created for.
Status Date:
Calendar:
Description:
Status:
3

Settings

Link % complete to actual costs:  Activates the scheduling grid columns of % complete*costs=actual costs.  This will be automatically calculated
Link % complete to remaining durations: Progress invoice line items that have been linked to tasks can have their % complete updated from the schedule.  there is a "button" that updates the % complete from the schedule to the progress line items, by each line item.
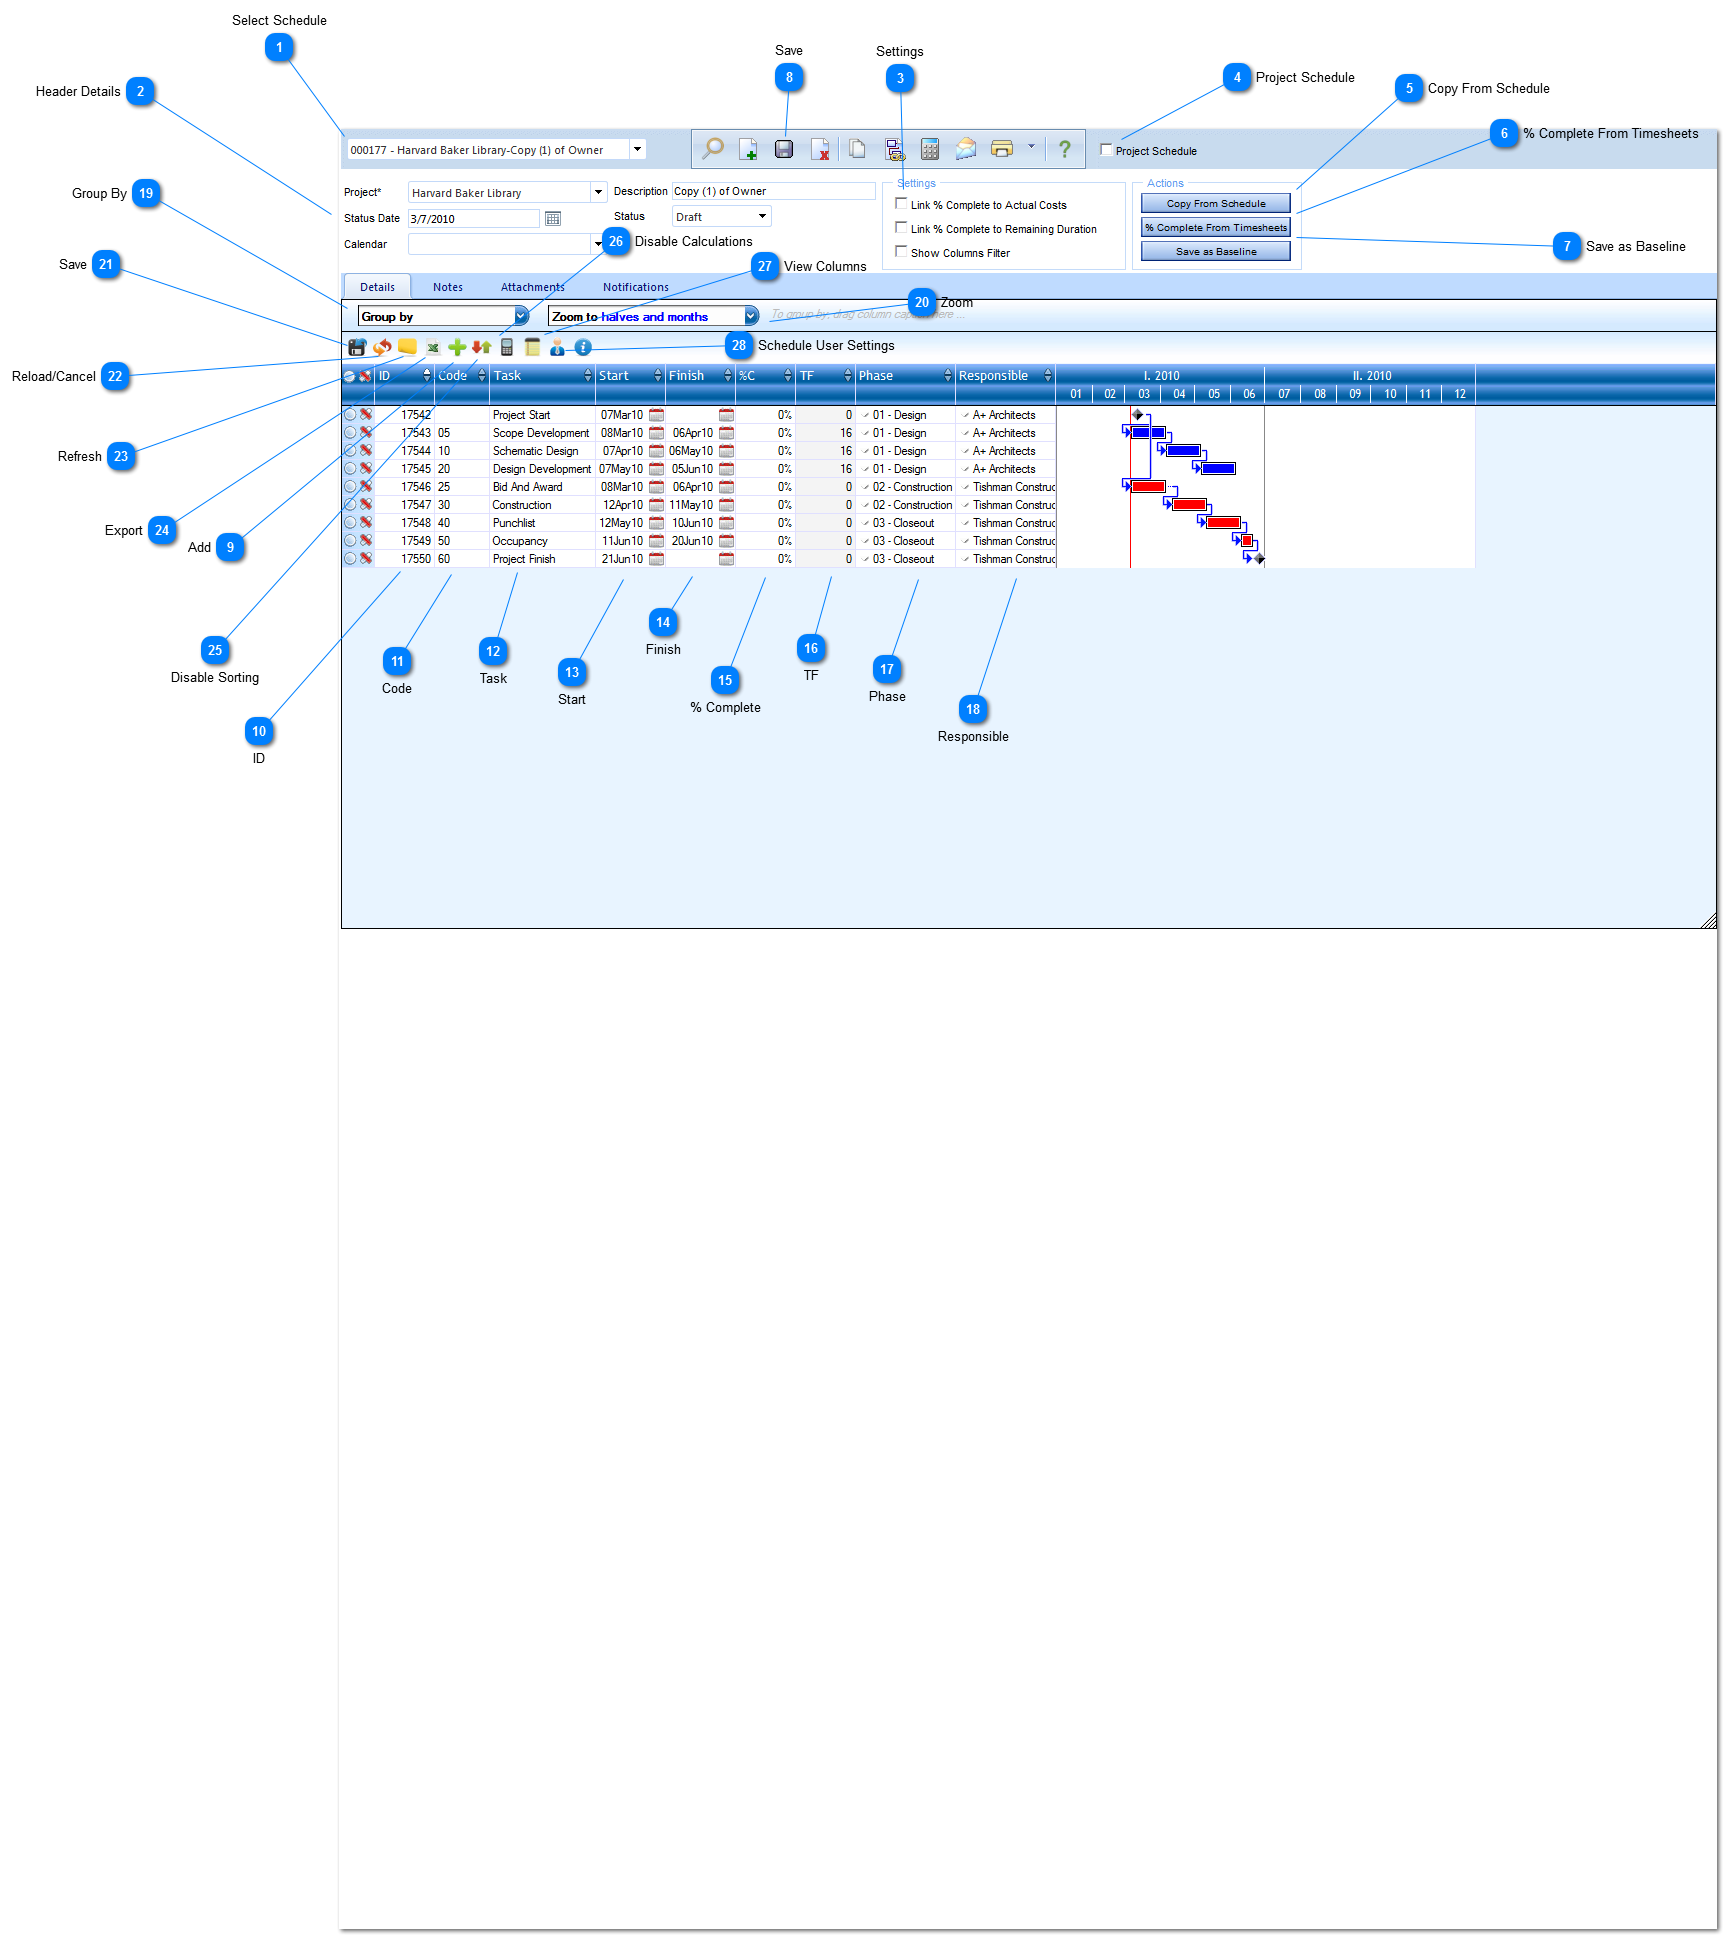
Show columns filter:  Displays the filter icon for each column in the grid.
 
4

Project Schedule

Check the box if you want this schedule be displayed in dashboard reporting (PPM, executive dashboard and portfolio views).  This also determines which task information           appears in the task dropdown menu throughout the system in progress invoices, forecasts, submittals etc.
5

Copy From Schedule

Click to copy from an existing project schedule.  Once selected, a list of available schedules will be displayed.  To select the schedule to copy, double click on the name of the schedule.  Once selected, the tasks will appear in the schedule grid.  The description field will contain "copy 1" which signifies that it is a copy.  Edit the description and click Save.
6

% Complete From Timesheets

If timesheet forms are being utilized, this option will update the percentage complete of tasks that were recorded in the timesheet.  Check the box if you would like the updates to be updated from the timesheets.
7

Save as Baseline

Click to save the original estimated dates of the schedule. This will allow for reporting of estimated vs actual start/finish dates and variances.
8

Save

Click to save the header details of the schedule.  Once saved, you will be able to add tasks to the schedule.
9

Add

Click to add, move or copy a task.
10

ID

This field will be automatically populated by PM Web.
11

Code

Enter the code for the task.  This will determine the order of the tasks within the schedule.
12

Task

Enter the name of the task.
13

Start

Enter the start date of the task.
14

Finish

Enter the finish date of the task.
15

% Complete

Enter the percentage complete of the task.  The schedule should be baselined before this field is updated.  These fields will be automatically  updated if the linked checkboxes are checked in the settings fields in the header details.  ???
16

TF

This field is automatically populated by PM Web with the total float in days.
17

Phase

Select the phase.
18

Responsible

Select the resource assigned to the task.  The options for this field are configured in the Scheduling>Project Codes menu.
19

Group By

Use to group by certain column headers (status, program etc.).
20

Zoom

Use to narrow/expand the gant view (years, quarters, weeks etc.).
21

Save

Click to save changes and submit to the server.
22

Reload/Cancel

Click to remove changes and return to the original settings.
23

Refresh

Click to refresh the data that appears on the screen.
24

Export

Click to export the schedule grid to excel.
25

Disable Sorting

Click to disable the sorting feature.
26

Disable Calculations

Click to disable calculations.
27

View Columns

Click to view the columns that are available to add to the view.  Once selected a list of columns will be displayed.  Select the columns to add to the view by placing a check mark in the column header box then click OK.
28

Schedule User Settings

Click to change the way schedule data is viewed.