Submitting a Vendor Application
After creating a login, your vendor will be able to create multiple applications.
Navigation Path: Separate PMWeb Login Page (ie. http://resellers.pmweb.com/hillbeta/PMWeb/ExternalUsers.aspx?db=1)
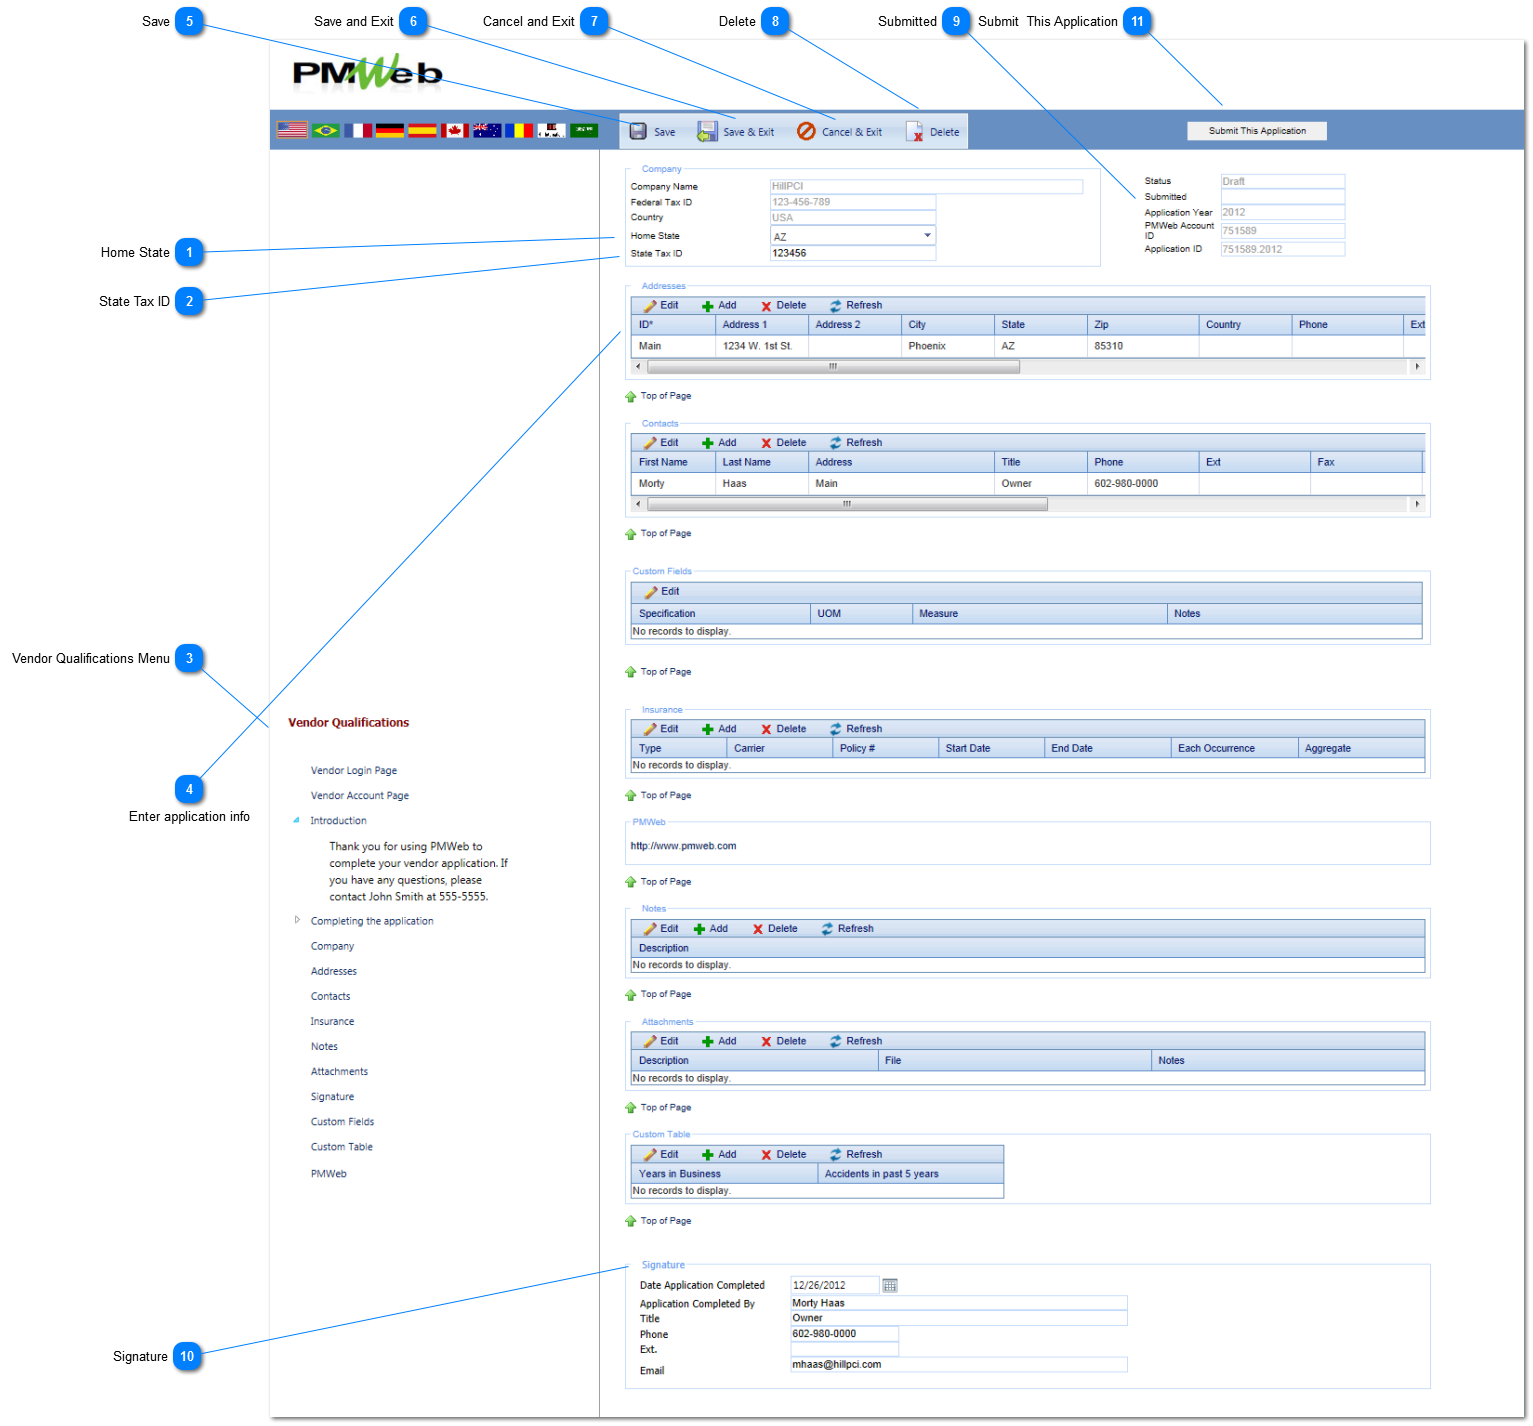
 Home StateEnter the state in which your company is located.
|
 State Tax IDEnter your state tax ID information.
|
 Vendor Qualifications MenuHere you will find a list of all of the sections that have been included in this application. This menu will "float" up and down the page as you move from section to section. Click on any menu item for further instructions and to jump to that section of the application.
|
 Enter application infoEnter information into all of the sections of the application.
Use the Add button to create a new line item to enter your information
To Edit a previously created entry, select the line item and press the Edit button
To remove a line item, select the line and press the Delete button.
|
 SavePress the Save button to save your work and remain on the page.
|
 Save and ExitPress the Save and Exit button to save your work and leave the page. You will be able to return by using your login information and editing your application that is in progress. NOTE: This action will not submit the application for approval.
|
 Cancel and ExitPress Cancel and Exit to close the page and lose any unsaved changes. Any changes that were previously saved will still be available when you log back in.
|
 DeletePress Delete to delete this application. All data will be lost and a new application will have to be created.
|
 SubmittedEnter the date that the application is being submitted.
|
 SignatureEnter vendor signature information here.
|
 Submit This ApplicationPress this button only after completing all information. Once Submitted, you will be able to view your application but you will no longer be able to make any changes to it.
|