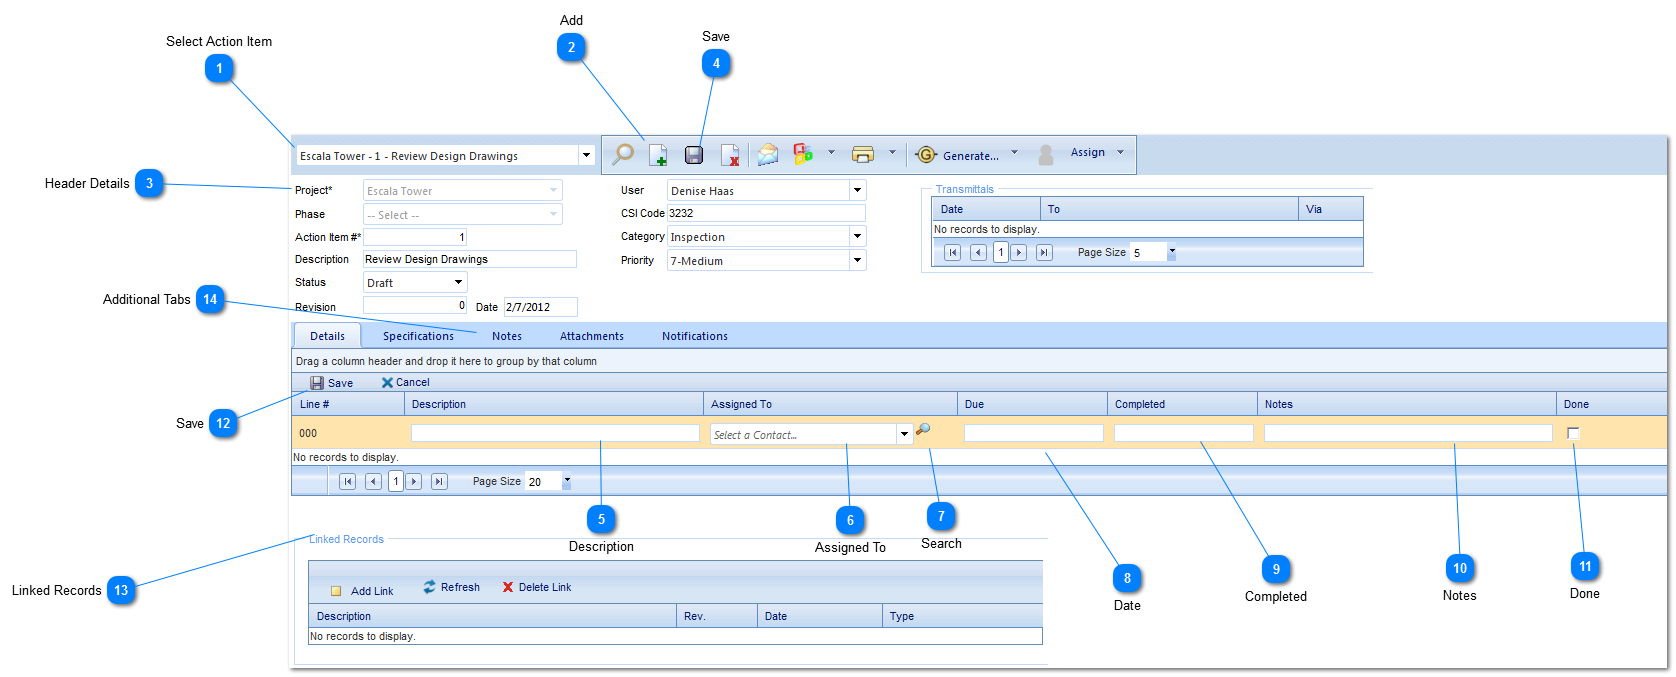
Project: Use to select the project associated with the Action Item.
Phase: Select the phase (construction, design, etc.) that the project is currently in. The options for this field are configured by your Administrator in the Portfolio>Lists>Projects menu.
Action Item #: The form number will automatically be populated by PMWeb with the next available numerical value depending on the type of form and project it relates to.
Description: Enter a general description (a more detailed description should be entered in the details section of this form).
Status: The status (draft, submitted etc.) will automatically be updated by PMWeb based on the workflow configuration.
Revision: Enter the revision number for this record.
Date: Enter the date of the Action Item.
User: Select the name of the user who is submitting the form. The available users are set up in Portfolio>Lists>Companies.
CSI Code: Enter the construction specification codes associated with the form (if applicable).
Category: Select the category (mechanical, electrical etc.) associated with the CSI code. The available options are configured by the Administrator in the Portfolio>Lists>Lists menu.
Priority: Select the priority (high, medium etc.) of the form. The available options are configured by the Administrator in the Portfolio>Lists>Lists menu.
Use to link form to other existing forms to show background/history.
Add Link: Click to link to another form. Once clicked, a list of the existing forms will appear. Select the forms you want to link and drag to the right hand side of the screen. Once complete click Save and Close located in the bottom right hand corner of the screen.
Refresh: Click to refresh the existing data.
Delete Link: Click to delete an existing link. To remove, highlight the item then click Delete.