To properly display this page you need a browser with JavaScript support.
The Link Setup module is used to link schedules that are housed in PM Web with schedules in other applications (Primavera etc.). Once updates are made to an offline schedule, their associated tasks will be updated in PM Web. The information required will require IT involvement.
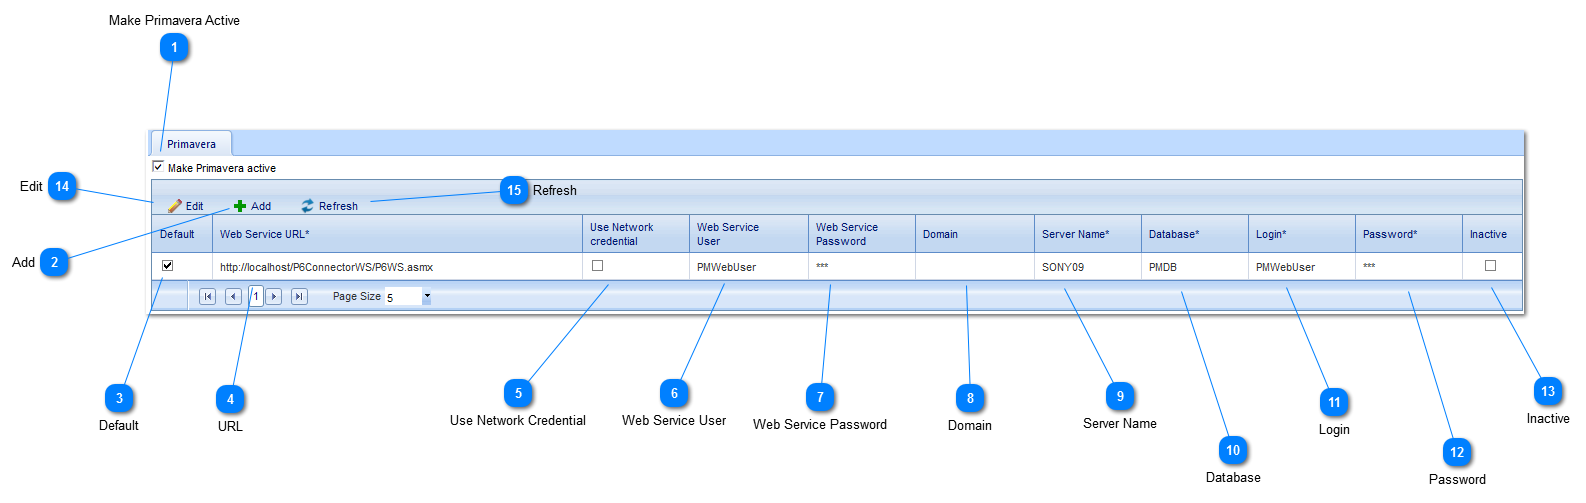
Navigation Path: Scheduling>Link Setup>Link Setup
Make Primavera Active Click to make the link to Primavera active.
Add Click to add a new link.
Default Click to make the link the default.
URL Enter the location or URL of the web service.
Use Network Credential Check the box to use the network credentials for the linked schedule.
Web Service User Enter the web service user name.
Web Service Password Enter the web service password.
Domain Enter the domain of the application.
Server Name Enter the server name of the application.
Database Enter the database where the application is located.
Login Enter the login of the application.
Password Enter the password to login to the application.
Inactive Check the box to make the link inactive. If the box is unchecked the link will be active.
Once all link information is entered, click Save.
Edit Click to edit an existing link. To modify, highlight the line item then click Edit.
Refresh Click to refresh the data displayed on the screen.