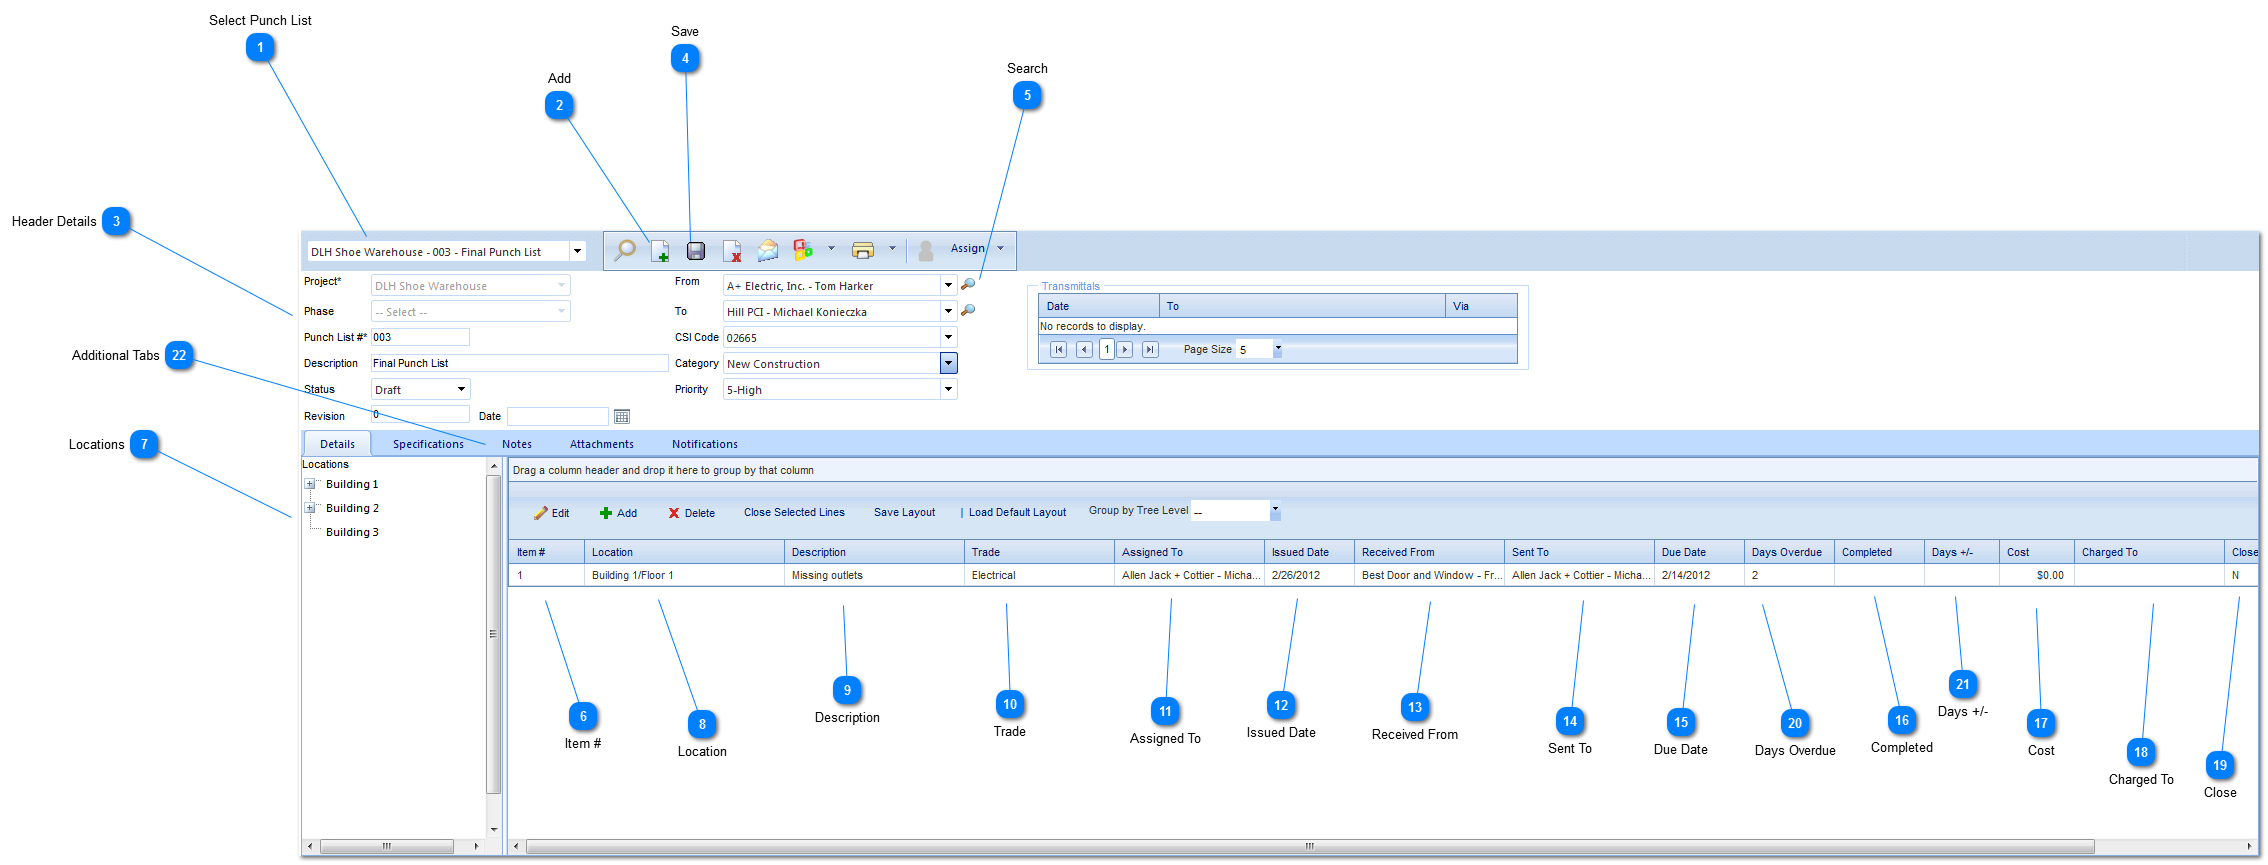
Project: Used to select the project associated with the Punch List.
Phase: Select the phase (construction, design, etc.) that the project is currently in. The options for this field are configured by your Administrator in the Portfolio>Lists>Projects menu.
Punch List #: The form number will automatically be populated by PMWeb with the next available numerical value depending on the type of form and project it relates to.
Description: Enter a general description (a more detailed description should be entered in the details section of this form).
Status: The status (draft, submitted etc.) will automatically be updated by PMWeb based on the workflow configuration.
Revision: Enter the revision number for this record.
Date: Enter a date for this item.
From: Select the name of the contact who is recording this Punch List item. The available contacts are set up in Portfolio>Lists>Companies.
To: Select the name of the contact who will be receiving this Punch List item. The available contacts are set up in Portfolio>Lists>Companies.
CSI Code: Enter or select the construction specification codes associated with the form (if applicable). The available options are configured by the Administrator in the Portfolio>Lists>Lists menu.
Category: Select the category (mechanical, electrical etc.) associated with the CSI code. The available options are configured by the Administrator in the Portfolio>Lists>Lists menu.
Priority: Select the priority (high, medium etc.) of the form. The available options are configured by the Administrator in the Portfolio>Lists>Lists menu.
Drag the location from the left side of the screen to the right. If you do not have any selections, see #8. These locations are configured by your Administrator in the Portfolio>Lists>Projects menu.
If a list of locations does not appear on the left hand side of your screen, manually enter the information. These locations are configured by your Administrator in the Portfolio>Lists>Projects menu.
Select the trade (mechanical, electrical etc.) from the drop down menu. These trades are configured by your Administrator in the Portfolio>Lists>Lists menu.